
Spring is officially here and so are the delicious treats! With spring’s beautiful pastel color palettes, along with sweet items you only find around this time of year, creating an Easter charcuterie board just feels right. But where to start? Don’t worry, we got you! We will break down some beautiful Easter charcuterie board ideas, plus, how to create them from start to finish.
View this post on Instagram
Step One: Choose A Base
Creating the perfect Easter charcuterie board is actually quite simple, but it all starts with the base. Selecting your board beforehand will help you get an idea of how many treats you need to fill it.
The number of people enjoying the treat board will determine the size of your base, although you can always create two smaller treat boards for a larger party, rather than a giant one.
Head to your kitchen and choose from your selection of wooden boards, or head to a store and grab one for the occasion! Just as beautiful as the treats are, your board selection can also be a point of interest, so feel free to get creative with your choice.
Step Two: Choose Your Treats
Selecting your treat variety is a personal preference. I like to keep my treat boards with a theme of candy in mind, or mix it up with a variety of cookies and candies. What matters is that it has that holiday feel. The easiest way to accomplish this is to keep your Easter charcuterie board Easter-themed or with Easter-centric colors.
For example, I will only purchase and plate Easter-themed treats (like chocolate eggs) or pastel-colored candies. That way, when you look at it, you immediately know the theme for the board, and it can double as a decor piece on your table.
Step Three: Choose A Centerpiece
Select a focal piece to put in the center of your board. When it comes to Easter charcuterie boards, I like to get a beautiful foil chocolate bunny and keep it wrapped, like the one shown in the photo. Another great idea is to take an Easter-themed cookie cutter and place it in the center of the board.
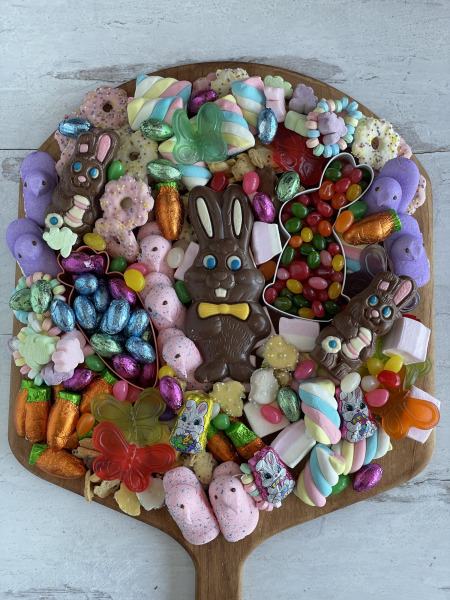
Fill the inside of the cookie cutter with small candies that are in the color scheme of your holiday. Having something beautiful in the center gives the eye something to focus on and makes the creation look more like a work of art. It also gives you something to build around.
Step Four: Mix And Match, Then Evaluate
Now it’s time to fill in the rest of your board. Arrange all of your choices on the table around your board so you can see what you are working with. Chances are, you bought more than you’ll need, so be prepared for leftovers.
Start to take your treat and candy selections and place them around the center and outsides of your board. Feel free to stop and look at your board and rearrange if needed. The goal is to have as much of your board covered, without it looking sloppy or thrown together. Once you are done and it is to your personal liking, take a step back and enjoy your edible piece of art!
Step Five: Take Those Pictures, Then Dig In
It’s perfectly normal to fall in love with your creation and not want anyone to ruin or touch it. But let’s be honest — that’s going to happen. Take those pictures and share on your social media, then leave it out on Easter for all to enjoy.
The steps are easily duplicated for any holiday gathering and can be translated to meat and cheese boards as well. The more boards you create, and the more fun you have creating, the more you will love the end result!

What’s your favorite Easter candy? Which pieces would you put in your board? Share your Easter charcuterie board ideas with us in the comments below!
Treat Yourself To These Tasty Family-Friendly Desserts:
